傅里叶变换
图像处理一般分为空间域处理和频率域处理。
空间域处理是直接对图像内的像素进行处理。空间域处理主要分为灰度变换和空间滤波变换两种形式。灰度变换是对图像内的单个像素进行处理,比如调节对比度和处理阈值等。空间滤波涉及图像质量的改变,例如图像平滑处理。空间域处理的计算简单方便,运算速度更快。
频率域处理是先将图像变换到频率域,然后在频率域对图像进行处理,最后再通过反变换将图像从频率域变换到空间域。傅里叶变换是应用最广泛的一种频域变换,它能够将图像从空间域变换到频率域,而逆傅里叶变换能够将频率域信息变换到空间域内。傅里叶变换在图像处理领域内有着非常重要的作用。
Numpy实现
Numpy实现傅里叶变换
1
2
3
4
| import cv2
from get_show_img import get_show
import numpy as np
import matplotlib.pyplot as plt
|
1
2
3
4
5
| img = cv2.imread('data/dog1.jpg', 0)
f = np.fft.fft2(img)
fshift = np.fft.fftshift(f)
magnitude_spectrum = 20 * np.log(np.abs(fshift))
get_show(img, magnitude_spectrum)
|

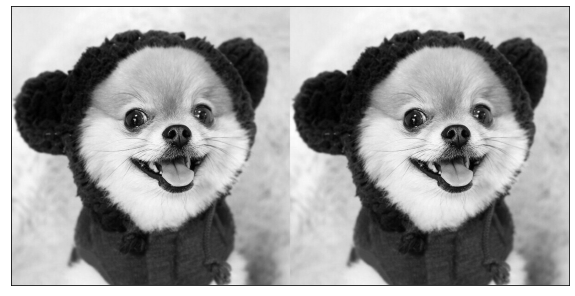
Numpy实现逆傅里叶变换
1
2
3
4
5
6
7
| img = cv2.imread('data/dog1.jpg', 0)
f = np.fft.fft2(img)
fshift = np.fft.fftshift(f)
ishift = np.fft.ifftshift(fshift)
iimg = np.fft.ifft2(ishift)
iimg = np.abs(iimg)
get_show(img, iimg)
|
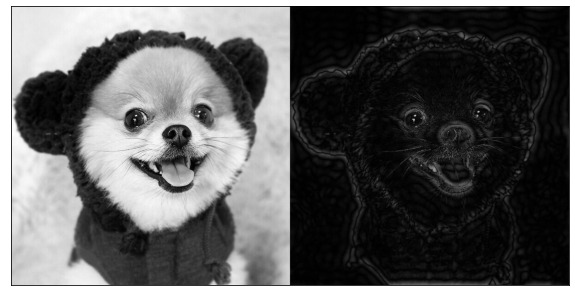
高通滤波
提取轮廓,边缘
在一幅图像内,同时存在高频信号和低频信号。
- 低频信号对应图像内变化缓慢的灰度分量。例如,在一幅大草原的图像中,低频信号对应着趋于一致的广袤草原。
- 高频信号对应图像内变化越来越快的灰度分量,是由灰度的尖锐过度造成的。如果在上面的大草原图像中还有一头狮子,那么高频信号就对应着狮子的边缘等信息。
滤波器能够允许一定频率的分量通过或者拒绝其通过,按照其作用方式可以划分为低通滤波器和高通滤波器。
1
2
3
4
5
6
7
8
9
10
11
| img = cv2.imread('data/dog1.jpg', 0)
cnum = 15
f = np.fft.fft2(img)
fshift = np.fft.fftshift(f)
rows, cols = img.shape
crow, ccol = rows//2, cols//2
fshift[crow-cnum:crow+cnum, ccol-cnum:ccol+cnum] = 0
ishift = np.fft.ifftshift(fshift)
iimg = np.fft.ifft2(ishift)
iimg = np.abs(iimg)
get_show(img, iimg)
|
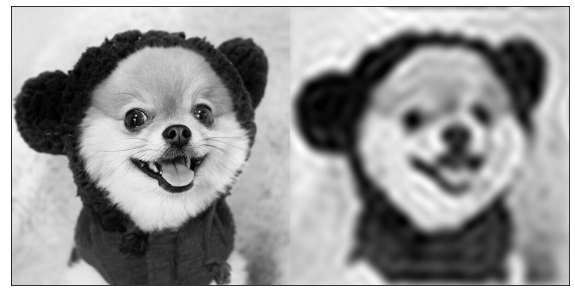
低通滤波
边缘模糊化
1
2
3
4
5
6
7
8
9
10
11
12
13
14
| img = cv2.imread('data/dog1.jpg', 0)
cnum = 15
f = np.fft.fft2(img)
fshift = np.fft.fftshift(f)
rows, cols = img.shape
crow, ccol = rows//2, cols//2
fshift[:crow-cnum,] = 0
fshift[crow+cnum:,] = 0
fshift[:, :ccol-cnum] = 0
fshift[:, ccol+cnum:] = 0
ishift = np.fft.ifftshift(fshift)
iimg = np.fft.ifft2(ishift)
iimg = np.abs(iimg)
get_show(img, iimg)
|
OpenCV实现
使用opencv实现傅里叶变换
1
2
3
4
| dft = cv2.dft(np.float32(img), flags=cv2.DFT_COMPLEX_OUTPUT)
dftShift = np.fft.fftshift(dft)
result = 20 * np.log(cv2.magnitude(dftShift[:, :, 0], dftShift[:, :, 1]))
get_show(img, result)
|

使用opencv实现逆傅里叶变换
1
2
3
4
5
6
7
| dft = cv2.dft(np.float32(img), flags=cv2.DFT_COMPLEX_OUTPUT)
dftShift = np.fft.fftshift(dft)
idftShift = np.fft.ifftshift(dftShift)
iImg = cv2.idft(idftShift)
iImg = cv2.magnitude(iImg[:, :, 0], iImg[:, :, 1])
get_show(img)
get_show(iImg)
|

1
2
3
4
5
6
7
8
9
10
11
12
13
14
| cnum = 50
dft = cv2.dft(np.float32(img), flags=cv2.DFT_COMPLEX_OUTPUT)
dftShift = np.fft.fftshift(dft)
rows, cols = img.shape
crow, ccol = rows//2, cols//2
dftShift[:crow-cnum,] = 0
dftShift[crow+cnum:,] = 0
dftShift[:, :ccol-cnum] = 0
dftShift[:, ccol+cnum:] = 0
idftShift = np.fft.ifftshift(dftShift)
iImg = cv2.idft(idftShift)
iImg = cv2.magnitude(iImg[:, :, 0], iImg[:, :, 1])
get_show(img)
get_show(iImg)
|