什么是JDBC
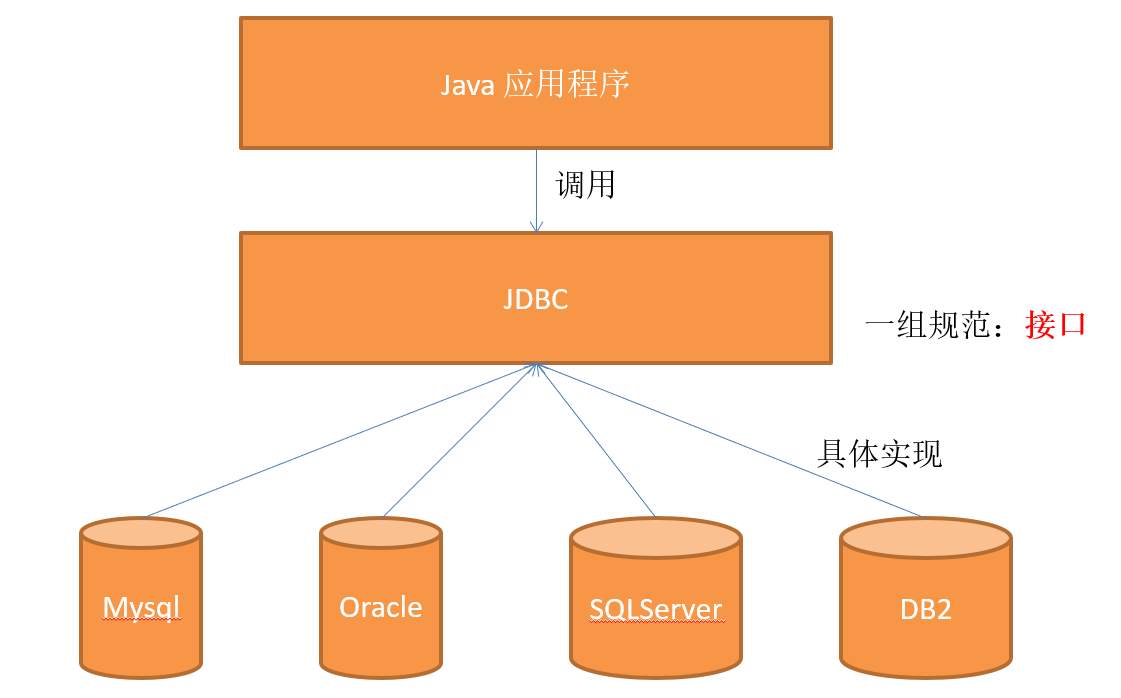
JDBC(Java Database Connectivity)是一个独立于特定数据库管理系统、通用的SQL数据库存取和操作的公共接口(一组API),定义了用来访问数据库的标准Java类库,(java.sql,javax.sql)使用这个类库可以以一种标准的方法、方便地访问数据库资源。
JDBC为访问不同的数据库提供了一种统一的途径,为开发者屏蔽了一些细节问题。
JDBC的目标是使Java程序员使用JDBC可以连接任何提供了JDBC驱动程序的数据库系统,这样就使得程序员无需对特定的数据库系统的特点有过多的了解,从而大大简化和加快了开发过程。
使用JDBC操作Mysql数据库
要使用Java操作不同的数据库,需要去调用不同的数据库厂商实现的JDBC JAR包。
例如在此我使用的是Mysql数据库,就需要导入Mysql数据库的JAR包。
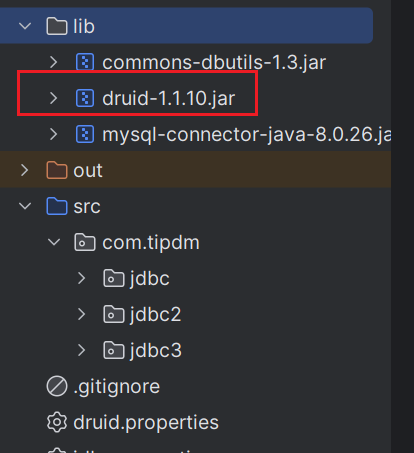
我们在当前工程下新建一个lib文件夹,用于存放第三方JAR包。
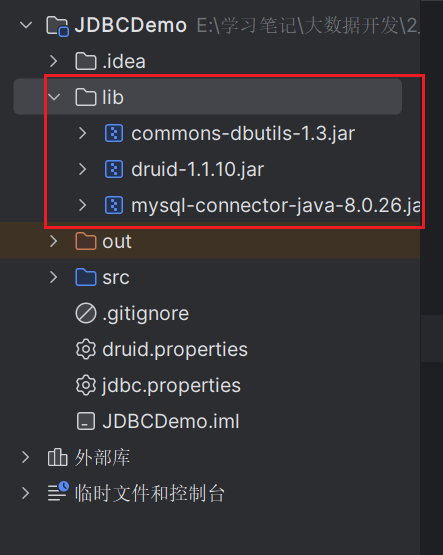
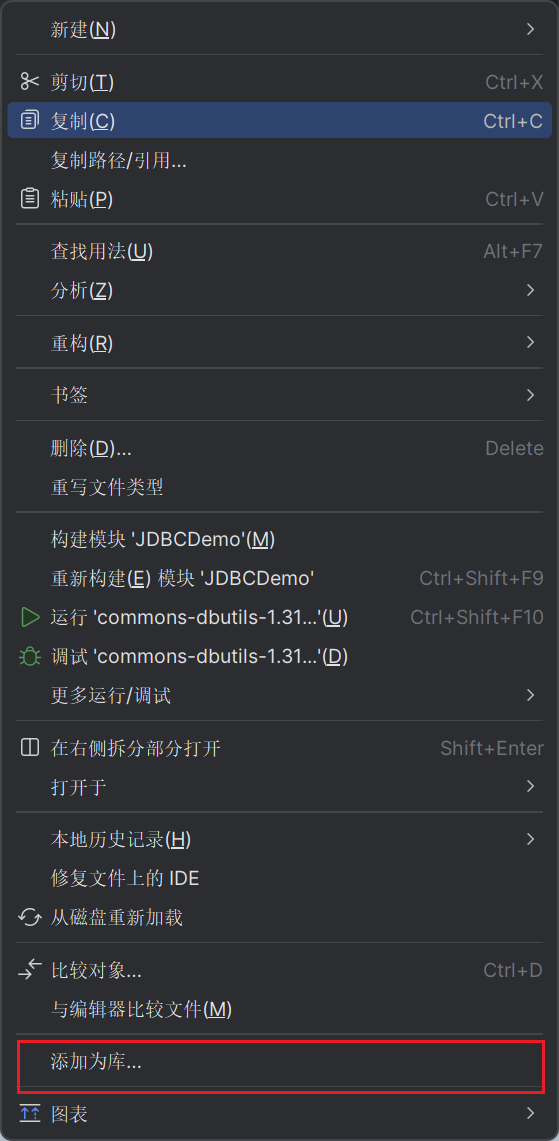
如图所示,将对应的JAR包放入lib文件夹。然后右键该JAR包,点击添加为库,这样才能被JAVA程序所调用。
获取Connection对象
要想操作数据库,首先需要去获取的数据库的连接。
常见的获取数据库连接的方式分为两种:
- 通过driver.connect()获取Connection对象
- 通过DriverManager获取Connection对象
通过driver.connect()获取Connection对象
方法:connect(String url, java.util.Properties info)
具体代码:
1
2
3
4
5
6
7
8
9
10
11
12
13
14
| @Test
public void test() throws SQLException {
Driver driver = new com.mysql.cj.jdbc.Driver();
String url = "jdbc:mysql://localhost:3306/jdbc_learn";
Properties p = new Properties();
p.setProperty("user", "root");
p.setProperty("password", "123456");
Connection connection = driver.connect(url, p);
System.out.println(connection);
}
|
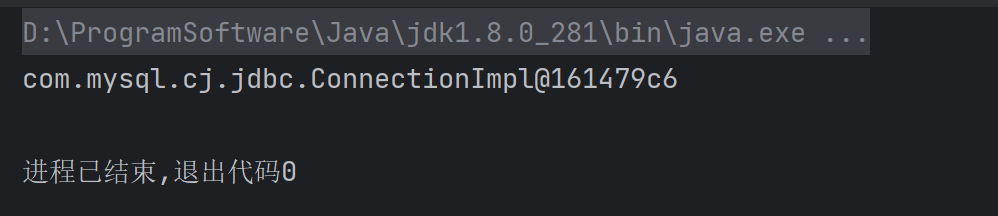
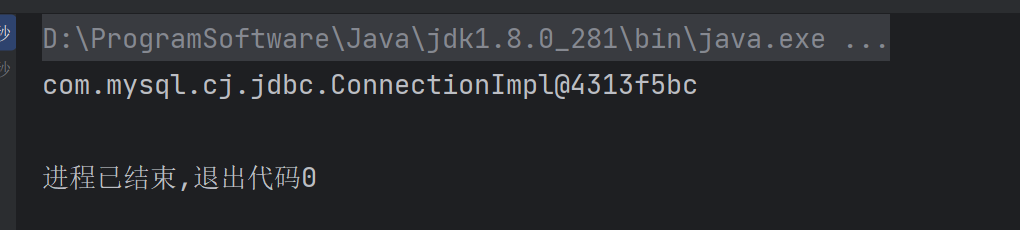
运行该测试单元,成功返回数据库连接对象的内存地址:
通过DriverManager获取Connection对象
1
2
3
4
5
6
7
8
9
10
11
12
13
14
15
16
| @Test
public void test2() throws SQLException {
Driver driver = new com.mysql.cj.jdbc.Driver();
DriverManager.registerDriver(driver);
String url = "jdbc:mysql://localhost:3306/jdbc_learn";
Connection connection = DriverManager.getConnection(url, "root", "123456");
System.out.println(connection);
}
|
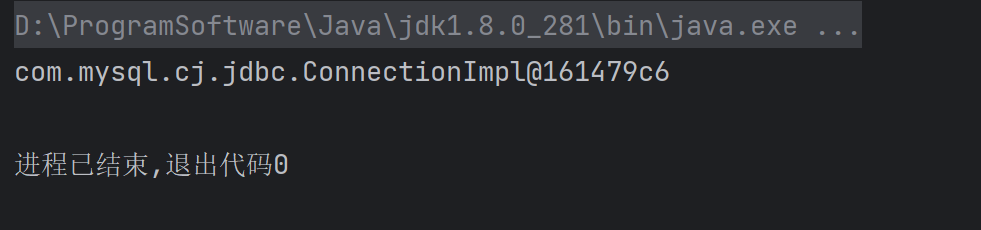
运行该测试单元通常可以正常返回连接对象的内存地址。
通过查看com.mysql.cj.jdbc.Driver类源码,我们发现在com.mysql.cj.jdbc.Driver类中有一个静态代码块,自动帮我们把driver注册进去了。
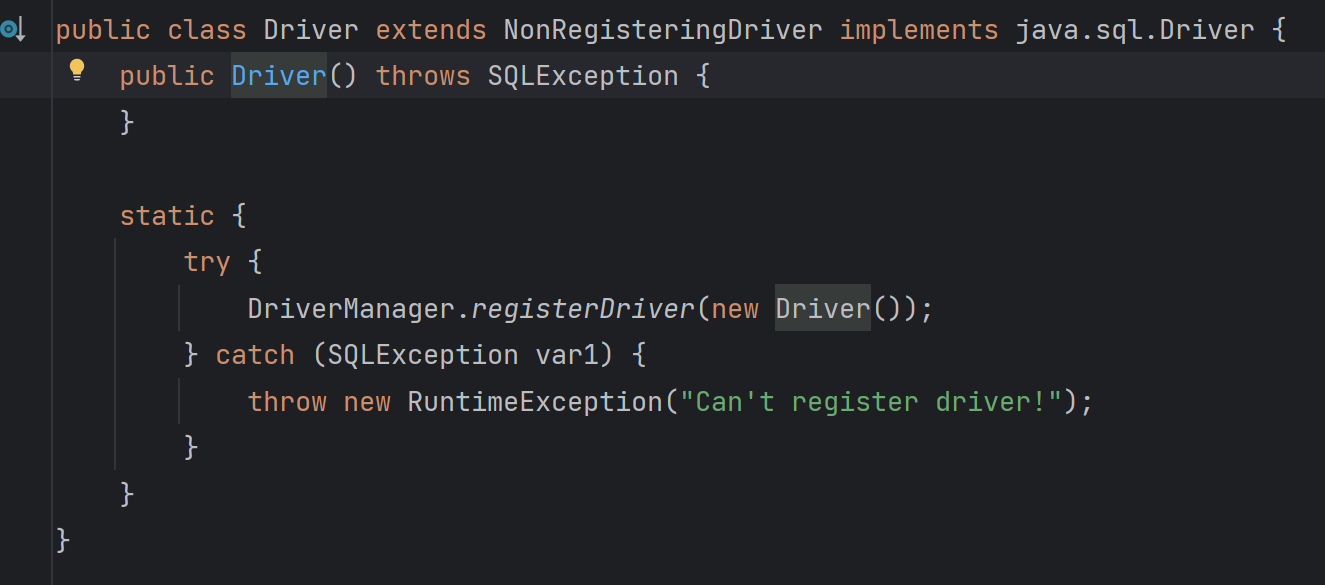
所以可以通过反射的方式让com.mysql.cj.jdbc.Driver运行其静态代码块,那么定义driver注册这一步可以省略。
改进代码:
1
2
3
4
5
6
7
8
9
10
| @Test
public void test3() throws Exception {
Class.forName("com.mysql.cj.jdbc.Driver");
String url = "jdbc:mysql://localhost:3306/jdbc_learn";
Connection connection = DriverManager.getConnection(url, "root", "123456");
System.out.println(connection);
}
|
同样没有问题。
DriverManager+配置文件
经过前面的学习,我们已经掌握了如何使用Java代码去创建一个数据库的连接对象Connection。但是前面代码的连接方式是将所需的所有参数全部写死,不便于后期维护和修改。(例如:如果后期我们需要更换数据库连接地址,如果将其写死了,会导致我们更换数据库时需要回到源码部分修改,十分繁琐。)
为了解决该问题,我们将所有的数据库连接信息,放入配置文件,通过对配置文件的读取来获取连接数据库所需要的相关字段。
在工程下新建一个jdbc.properties配置文件。其内容为:
1
2
3
4
| url = jdbc:mysql://localhost:3306/jdbc_learn
className = com.mysql.cj.jdbc.Driver
user=root
password=123456
|
- 读取配置文件获取数据库连接信息后再创建数据库连接。
1
2
3
4
5
6
7
8
9
10
11
12
13
14
15
16
17
18
19
| @Test
public void test4() throws Exception {
FileInputStream fis = new FileInputStream("jdbc.properties");
Properties properties = new Properties();
properties.load(fis);
String url = properties.getProperty("url");
String className = properties.getProperty("className");
String user = properties.getProperty("user");
String password = properties.getProperty("password");
fis.close();
Class.forName(className);
Connection connection = DriverManager.getConnection(url, user, password);
System.out.println(connection);
}
|
创建JDBCUtils
经过前面的学习,我们已经掌握了如何通过DriverManager对象+配置文件的形式去创建Connection对象。但是如果每次要获取Connection对象时都需要去按照前面的流程重新实现一遍这样就太繁琐了。接下来我们尝试将前面写的代码封装为工具类。
定义出来的工具类要求有一个静态方法可以直接去调用获取数据库的连接对象Connetion,还有一个静态方法是关闭连接资源。
初步实现如下:
1
2
3
4
5
6
7
8
9
10
11
12
13
14
15
16
17
18
19
20
21
22
23
24
25
26
27
28
29
30
31
32
33
34
35
36
37
38
39
40
41
42
43
44
45
46
47
48
49
50
| package com.tipdm.jdbc2;
import java.io.FileInputStream;
import java.io.IOException;
import java.sql.*;
import java.util.Properties;
public class JDBCUtils{
public static Connection getConnection(){
try {
FileInputStream fis = new FileInputStream("jdbc.properties");
Properties properties = new Properties();
properties.load(fis);
String url = properties.getProperty("url");
String className = properties.getProperty("className");
String user = properties.getProperty("user");
String password = properties.getProperty("password");
Class.forName(className);
Connection connection = DriverManager.getConnection(url, user, password);
return connection;
} catch (Exception e) {
throw new RuntimeException(e.getMessage());
} finally {
if (fis != null){
try {
fis.close();
}catch (IOException e){
e.printStackTrace();
}
}
}
}
public static void close(Connection connection, PreparedStatement ps) {
try {
connection.close();
ps.close();
} catch (SQLException e) {
throw new RuntimeException(e.getMessage());
}
}
}
|
但是这样会有一个问题,我们将读取配置文件的操作放入到了静态方法中,这样每次调用静态方法都会重新去读取一次配置文件,这是完全没有必要的。
要解决该问题,尝试将读取配置文件的操作移到外面来,用一个静态代码块来封装,这样只会在类导入的时候运行一次,重复调用静态方法去获取Connection对象就不会重复读取配置文件。
1
2
3
4
5
6
7
8
9
10
11
12
13
14
15
16
17
18
19
20
21
22
23
24
25
26
27
28
29
30
31
32
33
34
35
36
37
38
39
40
41
42
43
44
45
46
47
48
49
50
51
52
53
54
55
56
57
58
59
60
61
62
63
64
65
66
67
68
69
| package com.tipdm.jdbc2;
import java.io.FileInputStream;
import java.io.IOException;
import java.sql.*;
import java.util.Properties;
public class JDBCUtils{
static {
FileInputStream fis = null;
try {
fis = new FileInputStream("jdbc.properties");
Properties properties = new Properties();
properties.load(fis);
String url = properties.getProperty("url");
String className = properties.getProperty("className");
String user = properties.getProperty("user");
String password = properties.getProperty("password");
}catch (Exception e){
throw new RuntimeException(e.getMessage());
}finally {
if (fis != null){
try {
fis.close();
}catch (IOException e){
e.printStackTrace();
}
}
}
}
public static Connection getConnection(){
try {
Class.forName(className);
Connection connection = DriverManager.getConnection(url, user, password);
return connection;
} catch (Exception e) {
throw new RuntimeException(e.getMessage());
}
}
public static void close(Connection connection, PreparedStatement ps) {
try {
connection.close();
ps.close();
} catch (SQLException e) {
throw new RuntimeException(e.getMessage());
}
}
public static void close(PreparedStatement ps, Connection connection, ResultSet result) {
try {
connection.close();
ps.close();
result.close();
} catch (SQLException e) {
throw new RuntimeException(e.getMessage());
}
}
}
|
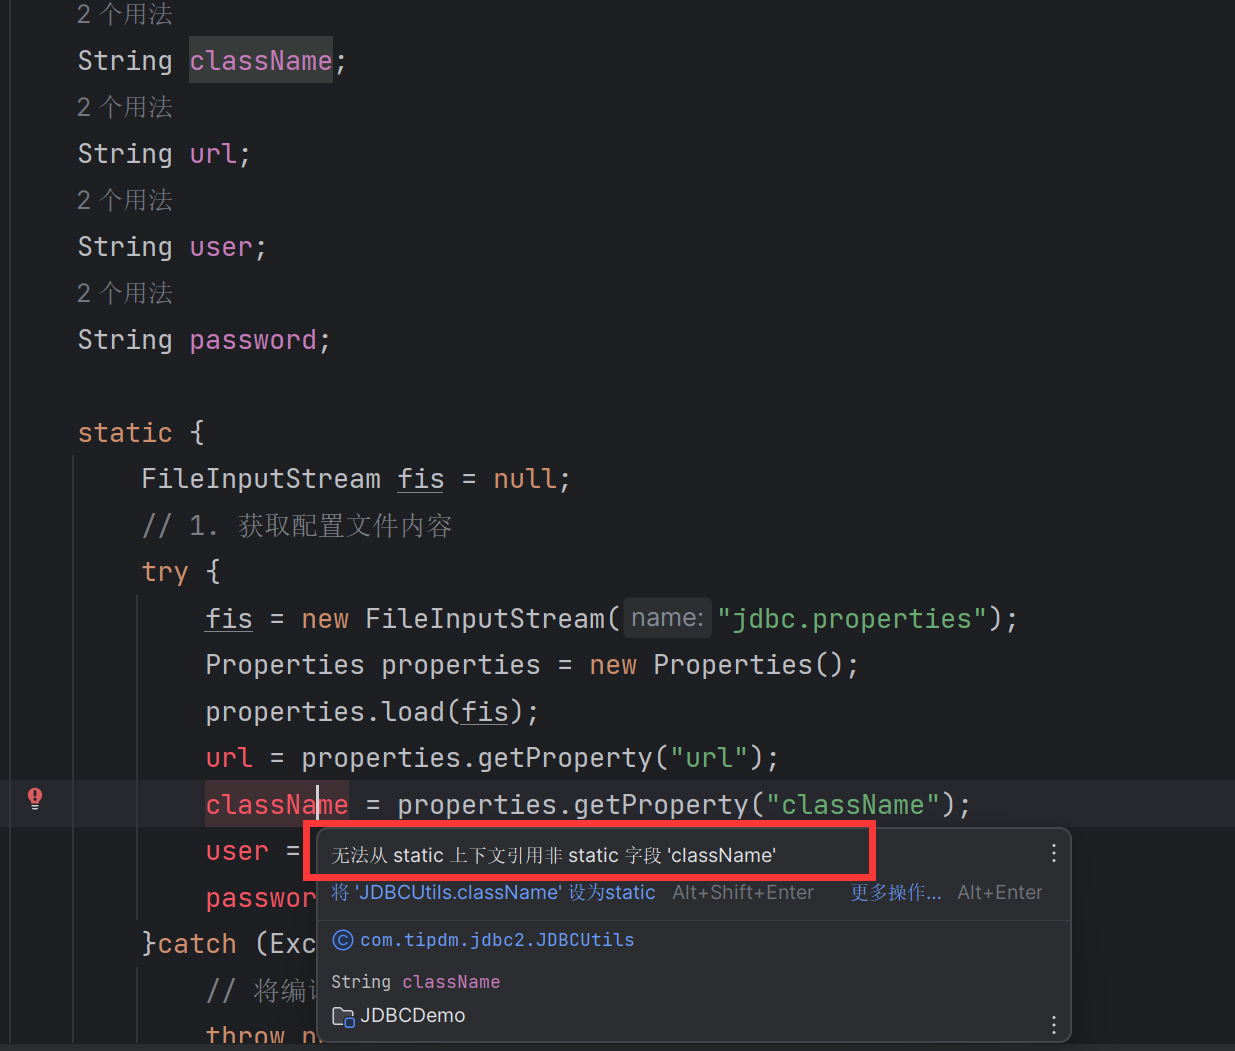
这样写又会有一个非常致命的错误,静态代码块中定义的变量,在外部是无法调用的,其生命周期为只有在运行静态代码块的内容时才会生效。
必须将定义的变量放到静态代码块外部。
1
2
3
4
5
6
7
8
9
10
11
12
13
14
15
16
17
18
19
20
21
22
23
24
25
26
27
28
29
30
31
32
33
34
35
36
37
38
39
40
41
42
43
44
45
46
47
48
49
50
51
52
53
54
55
56
57
58
59
60
61
62
63
64
65
66
67
68
69
70
71
72
73
| package com.tipdm.jdbc2;
import java.io.FileInputStream;
import java.io.IOException;
import java.sql.*;
import java.util.Properties;
public class JDBCUtils{
String className;
String url;
String user;
String password;
static {
FileInputStream fis = null;
try {
fis = new FileInputStream("jdbc.properties");
Properties properties = new Properties();
properties.load(fis);
url = properties.getProperty("url");
className = properties.getProperty("className");
user = properties.getProperty("user");
password = properties.getProperty("password");
}catch (Exception e){
throw new RuntimeException(e.getMessage());
}finally {
if (fis != null){
try {
fis.close();
}catch (IOException e){
e.printStackTrace();
}
}
}
}
public static Connection getConnection(){
try {
Class.forName(className);
Connection connection = DriverManager.getConnection(url, user, password);
return connection;
} catch (Exception e) {
throw new RuntimeException(e.getMessage());
}
}
public static void close(Connection connection, PreparedStatement ps) {
try {
connection.close();
ps.close();
} catch (SQLException e) {
throw new RuntimeException(e.getMessage());
}
}
public static void close(PreparedStatement ps, Connection connection, ResultSet result) {
try {
connection.close();
ps.close();
result.close();
} catch (SQLException e) {
throw new RuntimeException(e.getMessage());
}
}
}
|
提出来作为类属性后,发现静态代码块无法访问到相应的属性了。
这是由于静态代码块是在类加载时执行,而类属性是在使用类去创建对象时才会执行。
故需要将这几个变量定义为静态属性才行,静态属性也是在类加载时执行,这样静态代码块才可以去调用。
最终版:
1
2
3
4
5
6
7
8
9
10
11
12
13
14
15
16
17
18
19
20
21
22
23
24
25
26
27
28
29
30
31
32
33
34
35
36
37
38
39
40
41
42
43
44
45
46
47
48
49
50
51
52
53
54
55
56
57
58
59
60
61
62
63
64
65
66
67
68
69
70
71
72
73
74
75
| package com.tipdm.jdbc2;
import java.io.FileInputStream;
import java.io.IOException;
import java.sql.*;
import java.util.Properties;
public class JDBCUtils{
static String className;
static String url;
static String user;
static String password;
static {
FileInputStream fis = null;
try {
fis = new FileInputStream("jdbc.properties");
Properties properties = new Properties();
properties.load(fis);
url = properties.getProperty("url");
className = properties.getProperty("className");
user = properties.getProperty("user");
password = properties.getProperty("password");
}catch (Exception e){
throw new RuntimeException(e.getMessage());
}finally {
if (fis != null){
try {
fis.close();
}catch (IOException e){
e.printStackTrace();
}
}
}
}
public static Connection getConnection(){
try {
Class.forName(className);
Connection connection = DriverManager.getConnection(url, user, password);
return connection;
} catch (Exception e) {
throw new RuntimeException(e.getMessage());
}
}
public static void close(Connection connection, PreparedStatement ps) {
try {
connection.close();
ps.close();
} catch (SQLException e) {
throw new RuntimeException(e.getMessage());
}
}
public static void close(PreparedStatement ps, Connection connection, ResultSet result) {
try {
connection.close();
ps.close();
result.close();
} catch (SQLException e) {
throw new RuntimeException(e.getMessage());
}
}
}
|
使用Connection对象去操作数据库
为了演示后续的代码效果,首先需要在数据库中创建student表
1
2
3
4
5
| create table student(
id int,
name VARCHAR(20),
cid int
);
|
数据库中的插入操作
1
2
3
4
5
6
7
8
9
10
11
12
13
14
15
16
17
18
19
20
21
22
23
24
25
26
27
28
| @Test
public void test() throws SQLException {
Connection connection = JDBCUtils.getConnection();
String sql = "insert into student(id, name, sid) values(?, ?, ?)";
PreparedStatement ps = connection.prepareStatement(sql);
ps.setInt(1, 10);
ps.setString(2, "明哥");
ps.setInt(3, 1000);
int result = ps.executeUpdate();
System.out.println("共有" + result + "行数据受到影响。");
JDBCUtils.close(connection, ps);
}
|
数据库中的修改操作
1
2
3
4
5
6
7
8
9
10
11
12
13
14
15
16
17
18
19
20
21
22
23
24
25
26
|
@Test
public void test2() throws SQLException {
Connection connection = JDBCUtils.getConnection();
String sql = "update student set id=? where name=?";
PreparedStatement ps = connection.prepareStatement(sql);
ps.setInt(1, 9);
ps.setString(2, "明哥");
int result = ps.executeUpdate();
System.out.println("共有" + result + "行数据受到影响。");
JDBCUtils.close(connection, ps);
}
|
数据库中的删除操作
1
2
3
4
5
6
7
8
9
10
11
12
13
14
15
16
17
18
19
20
21
22
23
24
25
|
@Test
public void test3() throws SQLException {
Connection connection = JDBCUtils.getConnection();
String sql = "delete from student where id=?";
PreparedStatement ps = connection.prepareStatement(sql);
ps.setInt(1, 10);
int result = ps.executeUpdate();
System.out.println("共有" + result + "行数据受到影响。");
JDBCUtils.close(connection, ps);
}
|
数据库中的查询操作
为了演示查询效果,首先将student表中的数据清空,然后再插入指定数据。
1
2
3
4
5
6
7
| delete from student;
INSERT INTO student
VALUES
( 1, "aa", 1000 ),
( 2, "bb", 1001 ),
( 3, "cc", 1002 ),
( 4, "dd", 1003 )
|
查询所有数据,并直接打印数据内容。
1
2
3
4
5
6
7
8
9
10
11
12
13
14
15
16
17
18
19
20
21
22
23
24
25
26
27
28
29
| @Test
public void test() throws SQLException {
Connection connection = JDBCUtils.getConnection();
String sql = "select * from student where id!=?";
PreparedStatement ps = connection.prepareStatement(sql);
ps.setInt(1, 3);
ResultSet result = ps.executeQuery();
while(result.next()){
int id = result.getInt("id");
String name = result.getString("name");
int sid = result.getInt("sid");
System.out.println(id + "==" + name + "==" + sid);
}
JDBCUtils.close(ps, connection, result);
}
|
这种直接获取数据的方法固然很直观,能直接看到数据但是不符合我们Java中的面向对象思想,Java中万事万物皆对象,我们要想获取到数据,必须定义一个类来存放这个数据对象。这个类也被叫做JavaBean。
Student类:
1
2
3
4
5
6
7
8
9
10
11
12
13
14
15
16
17
18
19
20
21
22
23
24
25
26
27
28
29
30
31
32
33
34
35
36
37
38
39
40
41
42
43
44
45
46
47
48
49
| package com.tipdm.jdbc2;
public class Student {
private int id;
private String name;
private int sid;
public Student() {
}
public Student(int id, String name, int sid) {
this.id = id;
this.name = name;
this.sid = sid;
}
public int getId() {
return id;
}
public void setId(int id) {
this.id = id;
}
public String getName() {
return name;
}
public void setName(String name) {
this.name = name;
}
public int getSid() {
return sid;
}
public void setSid(int sid) {
this.sid = sid;
}
@Override
public String toString() {
return "Student{" +
"id=" + id +
", name='" + name + '\'' +
", sid=" + sid +
'}';
}
}
|
getStudents方法。
1
2
3
4
5
6
7
8
9
10
11
12
13
14
15
16
17
18
| public List<Student> getStudents() throws SQLException {
List<Student> listStudent = new ArrayList<>();
Connection connection = JDBCUtils.getConnection();
String sql = "select * from student where id!=?";
PreparedStatement ps = connection.prepareStatement(sql);
ps.setInt(1, 3);
ResultSet result = ps.executeQuery();
while(result.next()){
int id = result.getInt("id");
String name = result.getString("name");
int sid = result.getInt("sid");
listStudent.add(new Student(id, name, sid));
}
JDBCUtils.close(ps, connection, result);
return listStudent;
}
|
test3测试单元
1
2
3
4
5
6
7
8
9
10
| @Test
public void test3() throws SQLException {
List<Student> students = getStudents();
for (Student student : students) {
System.out.println(student);
}
}
|
数据库中的事务操作
事务的基本概念我们使用一个转账的例子进行解读,现在小明想给小红转账1000元。整个转账过程可以细分为以下两个步骤:
- 小明账户减少1000元。
- 小红账户增加1000元。
如果这两个步骤按照正常的步骤执行下去,那么肯定是没有问题的。但是现实生活中的场景是十分复杂的,有可能在小明账户减少1000元后,系统出现了问题导致,小红的账户钱没有增加,这个时候小明的钱也扣了,小红的却没有收到钱,1000元就莫名奇妙的消失了。
为了解决这个问题,就需要使用到事务操作。在进行事务操作时,会将以上两个步骤看成一个整体,要么两个操作都成功,要么两个操作都失败。这个就是事务的作用。
为了演示这个效果,首先创建一个account数据表用来存储用户的账户信息。
1
2
3
4
| CREATE TABLE account (
NAME VARCHAR ( 20 ),
balance INT
)
|
然后为数据表添加数据。
1
| insert into account values("小明", 2000), ("小红", 2000);
|
接下来使用事务操作。
1
2
3
4
5
6
7
8
9
10
11
12
13
14
15
16
17
18
19
20
21
22
23
24
25
26
27
28
29
30
31
32
33
34
35
36
37
38
39
40
41
42
43
44
45
46
47
48
49
| package com.tipdm.jdbc3;
import com.tipdm.jdbc2.JDBCUtils;
import java.sql.Connection;
import java.sql.PreparedStatement;
import java.sql.SQLException;
public class Account {
public static void main(String[] args) throws SQLException {
Connection connection = JDBCUtils.getConnection();
PreparedStatement preparedStatement = null;
try{
connection.setAutoCommit(false);
String sql = "update account set balance=? where name=?";
preparedStatement = connection.prepareStatement(sql);
preparedStatement.setInt(1, 1000);
preparedStatement.setString(2, "小明");
preparedStatement.executeUpdate();
System.out.println(1/0);
preparedStatement.setInt(1, 3000);
preparedStatement.setString(2, "小红");
preparedStatement.executeUpdate();
connection.commit();
System.out.println("数据提交");
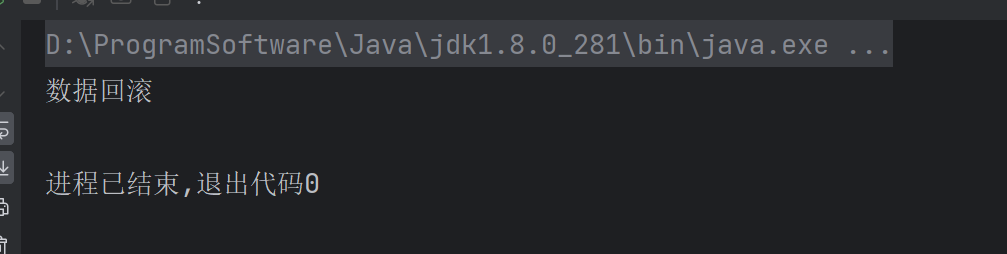
}catch (Exception e){
connection.rollback();
System.out.println("数据回滚");
}finally {
connection.setAutoCommit(true);
JDBCUtils.close(connection, preparedStatement);
}
}
}
|
这个时候控制台打印,发生数据回滚。
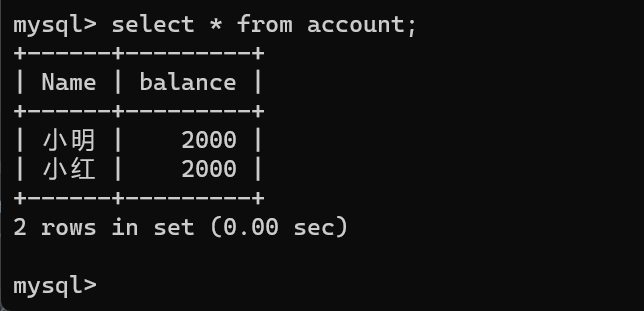
查看数据库中的数据发现两个账户均没有发生变化。
1
2
3
4
5
6
7
8
9
10
11
12
13
14
15
16
17
18
19
20
21
22
23
24
25
26
27
28
29
30
31
32
33
34
35
36
37
38
39
40
41
42
43
44
45
46
47
48
49
50
51
52
53
54
55
56
57
58
59
60
61
62
63
64
65
66
67
68
69
| package com.tipdm.jdbc3;
import com.tipdm.jdbc2.JDBCUtils;
import java.sql.Connection;
import java.sql.PreparedStatement;
import java.sql.SQLException;
public class Account {
public static void main(String[] args) throws SQLException {
Connection connection = JDBCUtils.getConnection();
PreparedStatement preparedStatement = null;
try{
connection.setAutoCommit(false);
String sql = "update account set balance=? where name=?";
preparedStatement = connection.prepareStatement(sql);
preparedStatement.setInt(1, 1000);
preparedStatement.setString(2, "小明");
preparedStatement.executeUpdate();
preparedStatement.setInt(1, 3000);
preparedStatement.setString(2, "小红");
preparedStatement.executeUpdate();
connection.commit();
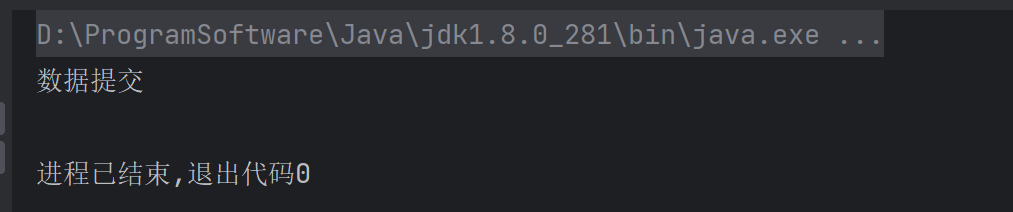
System.out.println("数据提交");
}catch (Exception e){
connection.rollback();
System.out.println("数据回滚");
}finally {
connection.setAutoCommit(true);
JDBCUtils.close(connection, preparedStatement);
}
}
}
|
此时控制台打印数据提交。
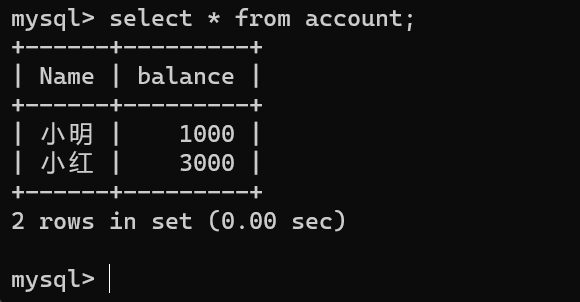
并且数据库中数据发生修改。
数据库连接池
数据库连接池的基本思想就是为数据库连接建立一个“缓冲池”。预先在缓冲池中放入一定数量的连接,当需要建立数据库连接时,只需从“缓冲池”中取出一个,使用完毕之后再放回去。
数据库连接池负责分配、管理和释放数据库连接,它允许应用程序重复使用一个现有的数据库连接,而不是重新建立一个。
数据库连接池在初始化时将创建一定数量的数据库连接放到连接池中,这些数据库连接的数量是由最小数据库连接数来设定的。无论这些数据库连接是否被使用,连接池都将一直保证至少拥有这么多的连接数量。连接池的最大数据库连接数量限定了这个连接池能占有的最大连接数,当应用程序向连接池请求的连接数超过最大连接数量时,这些请求将被加入到等待队列中。
数据库连接池的优点:
- 资源重用:由于数据库连接得以重用,避免了频繁创建,释放连接引起的大量性能开销。在减少系统消耗的基础上,另一方面也增加了系统运行环境的平稳性。
- 更快的系统反应速度:数据库连接池在初始化过程中,往往已经创建了若干数据库连接置于连接池中备用。此时连接的初始化工作均已完成。对于业务请求处理而言,直接利用现有可用连接,避免了数据库连接初始化和释放过程的时间开销,从而减少了系统的响应时间。
- 新的资源分配手段:对于多应用共享同一数据库的系统而言,可在应用层通过数据库连接池的配置,实现某一应用最大可用数据库连接数的限制,避免某一应用独占所有的数据库资源。
- 统一的连接管理,避免数据库连接泄露:在较为完善的数据库连接池实现中,可根据预先的占用超时设定,强制回收被占用连接,从而避免了常规数据库连接操作中可能出现的资源泄露。
DRUID(德鲁伊)介绍
DRUID是阿里巴巴开源平台上一个数据库连接池实现,它结合了C3P0、DBCP、PROXOOL等DB池的优点,同时加入了日志监控,可以很好的监控DB池连接和SQL的执行情况,可以说是针对监控而生的DB连接池,据说是目前最好的连接池。
同样,要想使用DRUID也需要去导入阿里开发的JAR包。例如:druid-1.1.10.jar
DRUID数据连接池获取Connection对象
使用步骤一共分为三步:
- 创建数据库连接池对象
- 给属性赋值
- 获取Connection对象
代码示例1:参数写死
1
2
3
4
5
6
7
8
9
10
11
12
13
14
15
| @Test
public void test() throws SQLException {
DruidDataSource druidDataSource = new DruidDataSource();
druidDataSource.setUsername("root");
druidDataSource.setPassword("123456");
druidDataSource.setDriverClassName("com.mysql.cj.jdbc.Driver");
druidDataSource.setUrl("jdbc:mysql://localhost:3306/jdbc_learn");
DruidPooledConnection connection = druidDataSource.getConnection();
System.out.println(connection);
connection.close();
}
|
代码示例2:使用配置文件
这个时候就需要跟前面一样创建一个druid.properties配置文件。
1
2
3
4
| url = jdbc:mysql://localhost:3306/jdbc_learn?rewriteBatchedStatements=true
driverClassName = com.mysql.cj.jdbc.Driver
username=root
password=123456
|
注意,在这个地方配置文件中的变量名是不允许随便命名的,一定要按照要求设置。
1
2
3
4
5
6
7
8
9
10
11
12
13
14
15
16
| @Test
public void test1() throws Exception {
Properties properties = new Properties();
FileInputStream fileInputStream = new FileInputStream("druid.properties");
properties.load(fileInputStream);
DataSource ds = DruidDataSourceFactory.createDataSource(properties);
Connection connection = ds.getConnection();
System.out.println(connection);
connection.close();
}
|
使用DRUID生成的Connection对象操作数据库
对表进行增、删、改的操作
使用的方法是创建QueryRunner对象,然后调用queryRunner对象中的update方法。
queryRunner.update(Connection conn, String sql, Object... params)
conn: Connection对象sql: sql语句params: 给占位符赋值的内容
1
2
3
4
5
6
7
8
9
10
| @Test
public void test() throws SQLException {
QueryRunner queryRunner = new QueryRunner();
int result = queryRunner.update(JDBCUtils.getConnection(),
"insert into student values(?,?,?);",
5, "abc", 1004);
System.out.println("共有" + result + "行数据受到影响。");
}
|
对表进行单条记录查询操作
使用的方法是创建QueryRunner对象,然后调用queryRunner对象中的query方法。
queryRunner.query(Connection conn, String sql, ResultSetHandler<T> rsh, Object... params)
1
2
3
4
5
6
7
8
9
10
11
| @Test
public void test2() throws SQLException {
QueryRunner queryRunner = new QueryRunner();
Student student = queryRunner.query(JDBCUtils.getConnection(),
"select id, name from student where id=?;",
new BeanHandler<Student>(Student.class),
5);
System.out.println(student);
}
|
对表进行多条记录查询操作
1
2
3
4
5
6
7
8
9
10
11
12
13
| @Test
public void test3() throws SQLException {
QueryRunner queryRunner = new QueryRunner();
List<Student> students = queryRunner.query(JDBCUtils.getConnection(),
"select id aid, name, sid from student where id!=?;",
new BeanListHandler<Student>(Student.class),
5);
for (Student student : students) {
System.out.println(student);
}
}
|
如果类中属性的名字和表中字段的名字不相同那么无法获取到对应的值。
解决办法:在查询时使用别名