MCP Server概念 MCP Server 是一个中间层服务器,它主要负责处理和管理 AI 模型的上下文信息,确保模型能够高效且准确地理解和响应用户请求。它作为应用程序和AI模型之间的桥梁,优化了信息的传递和处理过程。
根据MCP协议定义,Server可以提供三种类型的标准能力,Resources、Tools、Prompts ,每个Server可同时提供者三种类型能力或其中一种。
Resources: 资源,类似于文件数据读取,可以是文件资源或是API响应返回的内容。比如Tools: 工具,第三方服务、功能函数,通过此可控制LLM可调用哪些函数。Prompts: 提示词,为用户预先定义好的完成特定任务的模板。
MCP通信方式 MCP(Model Context Protocol)是一种为了统一大规模模型和工具间通信而设计的协议,它定义了消息格式和通信方式。MCP 协议支持多种传输机制,其中包括 stdio、Server-Sent Events(SSE) 和 Streamable HTTP。
stdio 传输方式是最简单的通信方式,通常在本地工具之间进行消息传递时使用。它利用标准输入输出(stdin/stdout)作为数据传输通道,适用于本地进程间的交互。
工作方式 :客户端和服务器通过标准输入输出流(stdin/stdout)进行通信。客户端向服务器发送命令和数据,服务器执行并通过标准输出返回结果。应用场景 :适用于本地开发、命令行工具、调试环境,或者模型和工具服务在同一进程内运行的情况。
Server-Sent Events(SSE) SSE 是基于 HTTP 协议的流式传输机制,它允许服务器通过 HTTP 单向推送事件到客户端。SSE 适用于客户端需要接收服务器推送的场景,通常用于实时数据更新。
工作方式 :客户端通过 HTTP GET 请求建立与服务器的连接,服务器以流式方式持续向客户端发送数据,客户端通过解析流数据来获取实时信息。应用场景 :适用于需要服务器主动推送数据的场景,如实时聊天、天气预报、新闻更新等。
Streamable HTTP Streamable HTTP 是 MCP 协议中新引入的一种传输方式,它基于 HTTP 协议支持双向流式传输。与传统的 HTTP 请求响应模型不同,Streamable HTTP 允许服务器在一个长连接中实时向客户端推送数据,并且可以支持多个请求和响应的流式传输。
不过需要注意的是,MCP只提供了Streamable HTTP协议层的支持,也就是规范了MCP客户端在使用Streamable HTTP通信时的通信规则,而并没有提供相关的SDK客户端。开发者在开发Streamable HTTP机制下的客户端和服务器时,可以使用比如Python httpx库进行开发。
工作方式 :客户端通过 HTTP POST 向服务器发送请求,并可以接收流式响应(如 JSON-RPC 响应或 SSE 流)。当请求数据较多或需要多次交互时,服务器可以通过长连接和分批推送的方式进行数据传输。应用场景 :适用于需要支持高并发、低延迟通信的分布式系统,尤其是跨服务或跨网络的应用。适合高并发的场景,如实时流媒体、在线游戏、金融交易系统等。
MCP Server实现流程 在本教程中将带领大家一起实现一个类似于MCP官网的天气查询MCP Server,但是与官网的MCP示例不同的是,官网的天气查询仅仅支持美国的州市,无法查询中国城市的天气情况。所以,在本教程中,使用的是openweather的免费接口,实现全世界各地的一个通用天气查询MCP服务。
业务功能实现 进入OpenWeather官网(https://openweathermap.org/),然后使用自己的信息注册一个账号。
接着我们需要申请一个API Keys,用于后期接口校验。点击My APIKeys。
默认的情况下,会自动给你生成一个API Keys,你可以直接使用默认生成的API Keys,或者自己重新创建一个API Keys。
虽然两者都可以,但是建议大家直接使用默认的API Keys即可,因为创建新的API Keys后,需要等5分钟左右才能生效。默认的API Keys只需要3分钟左右即可使用。
复制自己的API Keys后,点击菜单栏上的API即可开始选择自己所需要的服务。
需要注意的是,OpenWeather有很多关于天气的服务,但是并不是所有服务都是免费的,你需要根据他的描述,选择自己所需要的服务即可,在这里我们直接选择Current Weather Data接口,该接口是免费的。点击其对应的API doc。
该接口也有很多种请求方式,我们选择两种。
通过经纬度,请求对应经纬度的当前天气情况。
通过城市名称,查询对应城市名称的当前天气情况。
无论是哪种请求方式,API Key都是必填参数。
我们有了自己的API Key后,可以直接通过浏览器请求的方式,验证当前接口是否可用。直接在浏览器中输入url即可。
比如,我通过指定城市名称为wuhan,查询武汉对应的天气情况。
1 https:// api.openweathermap.org/data/ 2.5 /weather?q=wuhan&appid={API key}
注意:{API key}需要替换为你自己的。
有以下返回,说明接口是可用的。
如果返回以下内容,说明API Key未生效,或者API Key错误。如果是检查了API Key确定没有填写错误,那么请等待几分钟后重试。
到这里,我们已经支持如何通过经纬度和地名获取天气了,接下来要做的就是将该服务封装未MCP Server。
MCP Server功能编写 在这里,我们首先测试stdio通信方式,采用才本地开启一个MCP Server的方式实现。
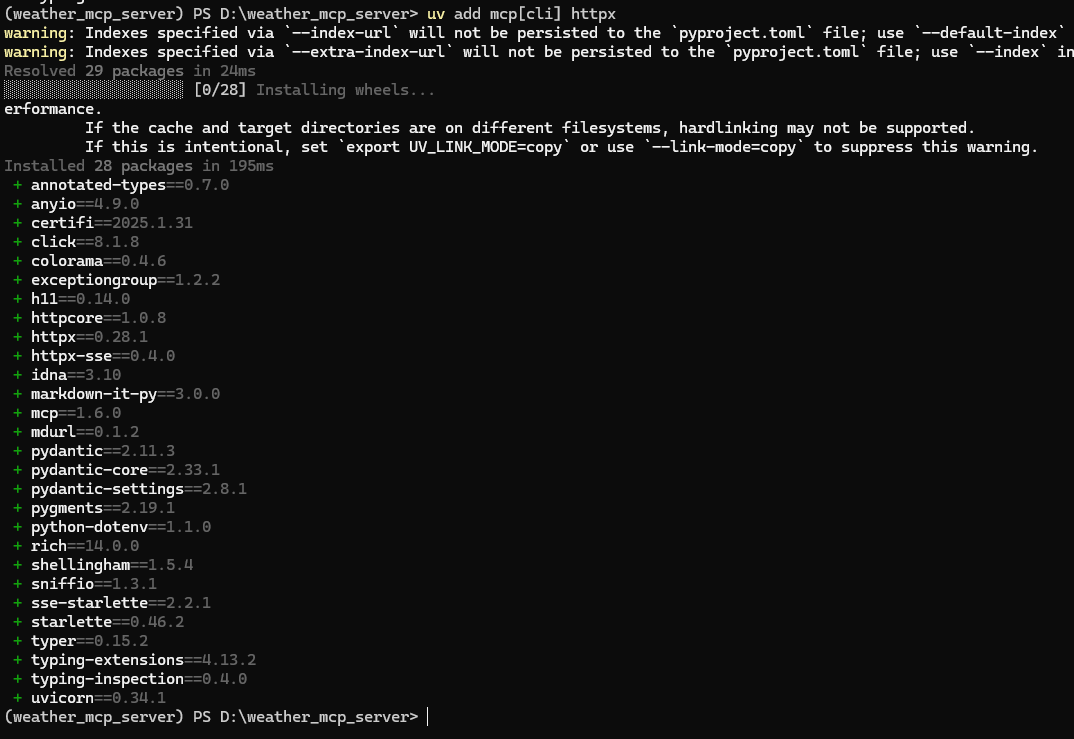
首先,使用uv工具,创建项目并安装相关依赖。这里我将项目放到D盘的根目录,在D盘下打开命令提示符。
1 uv init weather_mcp_server -p 3.10
接着进入uv工程。
然后输入以下命令,创建虚拟环境。
激活虚拟环境
由于我电脑中默认会激活一个conda的base虚拟环境,所以再激活uv工程的虚拟环境后,在路径前面出现了两个(),故我还需要执行以下命令,退出conda的base虚拟环境。
安装依赖
依赖准备完成,接下来开始代码编写部分内容。
weather.py代码如下所示:
注:代码中的{API KEY}部分,请替换为自己的API Key。
1
2
3
4
5
6
7
8
9
10
11
12
13
14
15
16
17
18
19
20
21
22
23
24
25
26
27
28
29
30
31
32
33
34
35
36
37
38
39
40
41
42
43
44
45
46
47
48
49
50
51
52
53
54
55
56
57
58
59
60
61
62
63
64
65
66
67
68
69
70
71
72
73
74
75
76
77
78
79
80
81
82
83
84
85
86
87
88
89
90
91
92
93
94
from typing import Any import httpxfrom mcp.server.fastmcp import FastMCPmcp = FastMCP("weather" ) NWS_API_BASE = "https://api.openweathermap.org/data/2.5/weather" USER_AGENT = "Mozilla/5.0 (Windows NT 10.0; Win64; x64) AppleWebKit/537.36 (KHTML, like Gecko) Chrome/135.0.0.0 Safari/537.36" def kelvin_to_celsius (kelvin: float ) -> float : return kelvin - 273.15 async def get_weather_from_cityname (cityname: str ) -> dict [str , Any ] | None : """向openweathermap发送请求并进行适当的错误处理。""" headers = { "User-Agent" : USER_AGENT, "Accept" : "application/geo+json" } params = { "q" : cityname, "appid" : "{API KEY}" } async with httpx.AsyncClient() as client: try : response = await client.get(NWS_API_BASE, headers=headers, params=params) response.raise_for_status() return response.json() except Exception: return None async def get_weather_from_latitude_longitude (latitude: float , longitude: float ) -> dict [str , Any ] | None : """向openweathermap发送请求并进行适当的错误处理。""" headers = { "User-Agent" : USER_AGENT, "Accept" : "application/geo+json" } params = { "lat" : latitude, "lon" : longitude, "appid" : "{API KEY}" } async with httpx.AsyncClient() as client: try : response = await client.get(NWS_API_BASE, headers=headers, params=params) response.raise_for_status() return response.json() except Exception: return None def format_alert (feature: dict ) -> str : """将接口返回的天气信息进行格式化文本输出""" if feature["cod" ] == 404 : return "参数异常,请确认城市名称是否正确。" elif feature["cod" ] == 401 : return "API key 异常,请确认API key是否正确。" elif feature["cod" ] == 200 : return f""" City: {feature.get('name' , 'Unknown' )} Weather: {feature.get('weather' , [{} ])[0].get('description', 'Unknown')} Temperature: {kelvin_to_celsius(feature.get('main' , {} ).get('temp', 0)):.2f}°C Humidity: {feature.get('main' , {} ).get('humidity', 0)}% Wind Speed: {feature.get('wind' , {} ).get('speed', 0):.2f} m/s """ else : return "未知错误,请稍后再试。" @mcp.tool() async def get_weather_from_cityname_tool (city: str ) -> str : """Get weather information for a city. Args: city: City name (e.g., "wuhan"). For Chinese cities, please use pinyin """ data = await get_weather_from_cityname(city) return format_alert(data) @mcp.tool() async def get_weather_from_latitude_longitude_tool (latitude: float , longitude: float ) -> str : """Get weather information for a location. Args: latitude: Latitude of the location longitude: Longitude of the location """ data = await get_weather_from_latitude_longitude(latitude, longitude) return format_alert(data) if __name__ == "__main__" : mcp.run(transport='stdio' )
在该代码中,我们一共定义了两个Tool:
get_weather_from_cityname_tool:通过城市名称获取天气情况。get_weather_from_latitude_longitude_tool:通过经纬度获取天气情况。
注意,由于MCP协议需要使用到@mcp.tool标记工具函数,所以使用@mcp.tool标记的工具函数,对应的注释务必写清除 ,后续大模型能够识别这些工具、工具如何使用以及工具功能,全都是通过这些注释进行解读的。所以一个好的MCP Server,其对应的Tool描述也必须要非常的清除。
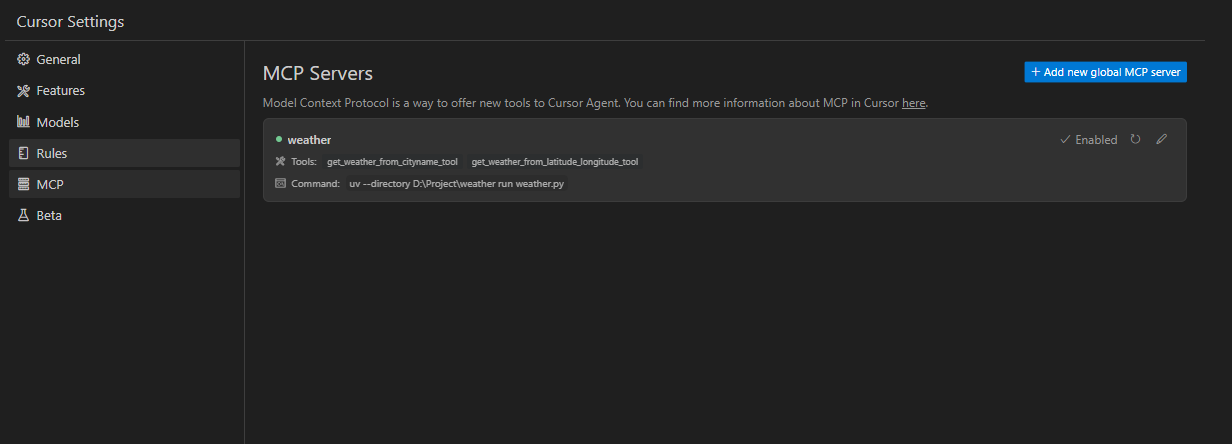
MCP Server测试 我们编辑好代码后,可以直接在cursor中测试该MCP Server是否可以正常提供功能和被大模型调用。
1
2
3
4
5
6
7
8
9
10
11
12
13
{ "mcpServers" : { "weather" : { "command" : "uv" , "args" : [ "--directory" , "D:\\weather_mcp_server" , "run" , "weather.py" ] } } }
设置完成后,可以发现Cursor可以成功加载我们自己写的weather MCP。
接下来,在对话中测试,看看是否可以调用到天气查询服务。
可以看到,我们自己编写的MCP Server可以成功被Corsor调用。
MCP Server发布 前面我们演示的是stdio方式的通信协议,该方式本质上就是在本地允许了一个服务,然后通过MCP Client去调用本地的服务实现的。
这种方式的缺点是,无法将自己的MCP Server,在不把源代码给别人的情况下,共享给其他人使用。这种方式在企业中肯定是不能够被允许的,源代码是企业的命脉。此时,SSE通信方式就派上用场了,可以使用SSE的通信方式将自己的MCP Server部署在服务器,然后其他所有的MCP Client要调用MCP Server对应的服务时,就无需在本地去执行MCP Server服务了。
如果需要其他所有人都可以访问当你的MCP Server,就需要将自己的MCP Server配置到公网服务器。
在公网中配置环境的方式与前面的流程一致,需要按照以下方式修改代码即可。
将weather_sse.py代码修改为以下内容,配置为sse通信协议。
1
2
3
4
5
6
7
8
9
10
11
12
13
14
15
16
17
18
19
20
21
22
23
24
25
26
27
28
29
30
31
32
33
34
35
36
37
38
39
40
41
42
43
44
45
46
47
48
49
50
51
52
53
54
55
56
57
58
59
60
61
62
63
64
65
66
67
68
69
70
71
72
73
74
75
76
77
78
79
80
81
82
83
84
85
86
87
88
89
90
91
92
93
94
95
96
97
98
99
100
101
102
103
from typing import Any import httpxfrom mcp.server.fastmcp import FastMCPmcp = FastMCP( name="weather" , host="0.0.0.0" , port=8000 , description="通过城市名称(拼音)或经纬度获取天气信息" , sse_path="/sse" ) NWS_API_BASE = "https://api.openweathermap.org/data/2.5/weather" USER_AGENT = "Mozilla/5.0 (Windows NT 10.0; Win64; x64) AppleWebKit/537.36 (KHTML, like Gecko) Chrome/135.0.0.0 Safari/537.36" def kelvin_to_celsius (kelvin: float ) -> float : return kelvin - 273.15 async def get_weather_from_cityname (cityname: str ) -> dict [str , Any ] | None : """向openweathermap发送请求并进行适当的错误处理。""" headers = { "User-Agent" : USER_AGENT, "Accept" : "application/geo+json" } params = { "q" : cityname, "appid" : "24ecadbe4bb3d55cb1f06ea48a41ac51" } async with httpx.AsyncClient() as client: try : response = await client.get(NWS_API_BASE, headers=headers, params=params) response.raise_for_status() return response.json() except Exception: return None async def get_weather_from_latitude_longitude (latitude: float , longitude: float ) -> dict [str , Any ] | None : """向openweathermap发送请求并进行适当的错误处理。""" headers = { "User-Agent" : USER_AGENT, "Accept" : "application/geo+json" } params = { "lat" : latitude, "lon" : longitude, "appid" : "24ecadbe4bb3d55cb1f06ea48a41ac51" } async with httpx.AsyncClient() as client: try : response = await client.get(NWS_API_BASE, headers=headers, params=params) response.raise_for_status() return response.json() except Exception: return None def format_alert (feature: dict ) -> str : """将接口返回的天气信息进行格式化文本输出""" if feature["cod" ] == 404 : return "参数异常,请确认城市名称是否正确。" elif feature["cod" ] == 401 : return "API key 异常,请确认API key是否正确。" elif feature["cod" ] == 200 : return f""" City: {feature.get('name' , 'Unknown' )} Weather: {feature.get('weather' , [{} ])[0].get('description', 'Unknown')} Temperature: {kelvin_to_celsius(feature.get('main' , {} ).get('temp', 0)):.2f}°C Humidity: {feature.get('main' , {} ).get('humidity', 0)}% Wind Speed: {feature.get('wind' , {} ).get('speed', 0):.2f} m/s """ else : return "未知错误,请稍后再试。" @mcp.tool() async def get_weather_from_cityname_tool (city: str ) -> str : """Get weather information for a city. Args: city: City name (e.g., "wuhan"). For Chinese cities, please use pinyin """ data = await get_weather_from_cityname(city) return format_alert(data) @mcp.tool() async def get_weather_from_latitude_longitude_tool (latitude: float , longitude: float ) -> str : """Get weather information for a location. Args: latitude: Latitude of the location longitude: Longitude of the location """ data = await get_weather_from_latitude_longitude(latitude, longitude) return format_alert(data) if __name__ == "__main__" : print ("Starting server..." ) mcp.run(transport='sse' )
在公网中执行该脚本,开启MCP SSE Server。执行完成后,可以看到如下图所示的打印结果。
此时,再次使用Cursor测试SSE MCP Server服务是否可以正常调用。
在Cursor的MCP配置中,修改配置文件如下所示:
1
2
3
4
5
6
7
{ "mcpServers" : { "weather" : { "url" : "http://{你的公网IP}:8000/sse" } } }
配置完成后,最好重启Cursor一次,因为前面我们加载过相同名字的MCP服务。
重启完成后,可以看到Cursor也是可以正常识别到我们的MCP Server。
测试功能是否可以正常调用。
功能也可以正常调用。
服务器也有请求响应。